11
• Slide the battery (9) into the charger (10) (g. B). Ensure the battery is
properly tted (pushed to the end).
When the charger is connected to a mains socket (230 V AC), the green
diode (11) on the charger turns on to indicate connected supply.
When the battery (9) is placed in the charger (10), the red diode (11) on
the charger turns on to indicate that the charging is in progress.
At the same time green diodes (13) of the battery level indication are
ashing in dierent congurations, see description below.
• All diodes are ashing – the battery is empty and requires charging.
• 2 diodes are ashing – the battery is partially discharged.
• 1 diode is ashing – the battery level is high.
Once the battery is charged, the diode (11) on the charger lights green,
and all battery level indication diodes (13) light continuously. After
some time (approx. 15 s) the battery level indication diodes (13) turn o.
Do not charge the battery for more than 8 hours. Exceeding this time
limit may cause damage to battery cells. The charger does not turn
o automatically when the battery is full. Green diode on the charger
will remain on. Battery level indication diodes turn o after some
time. Disconnect power supply before removing the battery from the
charger socket. Avoid consecutive short chargings. Do not charge the
battery after short use of the tool. Signicant decrease of the period
between chargings indicates the battery is worn out and should be
replaced.
Batteries heat up when charging. Do not operate just after charging –
wait for the battery to cool down to room temperature. It will prevent
battery damage.
BATTERY LEVEL INDICATION
The battery is equipped with battery level indicator (3 LED diodes)
(13). To check battery level status, press the button for battery level
indication (12) (g. C). When all diodes are lit, the battery level is high.
When 2 diodes are on, the battery is partially discharged. When only one
diode is lit, the battery is discharged and must be recharged.
ADJUSTABLE MAIN HANDLE
Before starting operation you can adjust main handle to the position
most comfortable for the task. The handle can be set up in 3 positions
by turning it 90° left or right from the basic position.
When changing position of the main handle make sure not to press
the switch button, since this blocks rotation of the handle.
• Press the main handle lock button (5) (g. D).
• Turn the main handle to desired position.
• The main handle automatically locks in the position.
OPERATION / SETTINGS
SWITCHING ON SWITCHING OFF
Remove blade bar shield and install battery before switching on.
The hedge trimmer features safe switch that requires both hands to
activate.
Switching on – press the switch lock button (4) and hold, then press the
switch button (6) (g. E).
Switching o – release pressure on the switch button (6) or the switch
lock button (4).
The hedge trimmer will start only when you simultaneously press
the switch lock button (4) with one hand, and the switch (6) with the
other. When one of the buttons is released, the hedge trimmer stops.
Safety brake of the blade will stop the blade in less than 1 second
after the switch is released.
INSTRUCTIONS REGARDING SAFE USE
Before starting to work, carefully check the hedge against invisible
objects, such as fence, mesh etc.
• When trimming long branches perform the work gradually, by layers.
• Operate the hedge trimmer only when the hedge is dry.
• After the work is nished put the blade bar shield on (g. F).
TRIMMING HEDGES
• Besides trimming hedges, the hedge trimmer can also be used to trim
bushes and shrubs.
• The best results can be achieved when guiding the blade bar so it is at
an angle of approx. 15° with respect to the hedge.
• Two sided blade and counter-moving cutting parts allow cutting in
both directions or swinging motion (g. G).
• To obtain uniform height of a hedge, it is recommended to extend a
rope or a line along trimmed hedge plane. Cut branches protruding
above the dened line (g. H).
• To guide the branches into the blade, move the blade bar evenly
forward or backward along the line of cutting.
• Perform hedge sides trimming in arc motions, from bottom upwards
(g. I).
OPERATION AND MAINTENANCE
Remove the battery from the device before commencing any
activities related to installation, adjustment, repair or maintenance.
Exercise caution due to sharp edges of cutting blades. When not in
use, the blade bar should always be protected with the blade shield.
MAINTENANCE AND STORAGE
• Cleaning the device immediately after each use is recommended.
• If possible, motor casing should be always free from dust and dirt.
• Wipe the device with a clean cloth or blow through with compressed
air at low pressure.
• Do not use any cleaning agents or solvents, they may damage plastic
parts.
• Be careful to avoid ingress of water into the device.
• Check the hedge trimmer against obvious damages, such as loosened
or damaged blade, loose screw joints and worn out or damaged
structural parts.
• Make sure that guards and protection parts are not damaged and
installed properly. Carry out all necessary maintenance and repair
works before using the hedge trimmer.
• Clean the blade bar and spray maintenance liquid on it after each
use. When operating the tool for a long time, it is recommended to
regularly lubricate the blade with thin layer of oil (g. J).
• Check condition of blade edges.
• Use only original equipment and original spare parts.
• Store the hedge trimmer in a safe, dry place, beyond reach of children.
• Do not put any objects on the hedge trimmer body.
• Store the device with the battery removed.
All defects should be repaired by service workshop authorized by the
manufacturer.
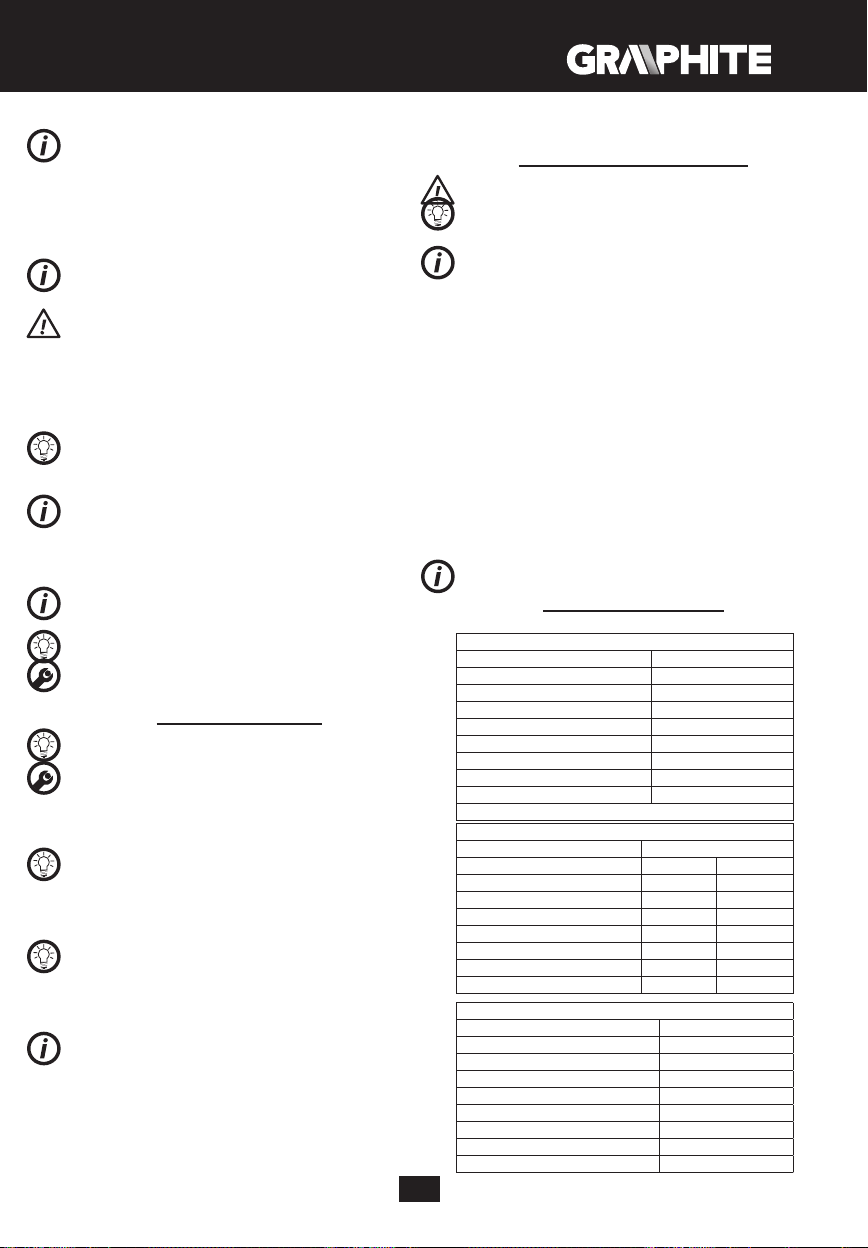
TECHNICAL PARAMETERS
RATED PARAMETERS
Cordless Hedge Trimmer 58G032
Parameter Value
Battery voltage 18 V DC
No load blade speed 1300 min
-1
Cutting width 510 mm
Blade bar length 570 mm
Max. cutting thickness 15 mm
Protection class III
Weight
2,2 kg
Year of production 2021
58G032 denes type and indication of the device
Graphite Energy+ System Battery
Parameter Value
Battery 58G001 58G004
Battery voltage 18 V DC 18 V DC
Battery type Li-Ion Li-Ion
Battery capacity 2000 mAh 4000 mAh
Ambient temperature range 4
0
C – 40
0
C 4
0
C – 40
0
C
Charging time for charger 58G002 1 h 2 h
Weight 0,400 kg 0,650 kg
Year of production 2021 2021
Graphite Energy+ System Charger
Parameter Value
Charger type
58G002
Supply voltage
230 V AC
Power supply frequency
50 Hz
Charging voltage
22 V DC
Max. charging current
2300 mA
Ambient temperature range
4
0
C – 40
0
C
Charging time of the battery 58G001
1 h
Charging time of the battery 58G004
2 h



Zapojte se do konverzace o tomto výrobku
Zde můžete sdílet, co si myslíte o Graphite 58G032 Křovinořez. Máte-li dotaz, nejprve si pozorně přečtěte návod. Žádost o příručku lze provést pomocí našeho kontaktního formuláře.