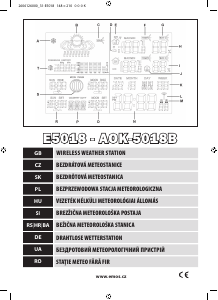
Manuál EMOS E5018 Meteostanice

Potřebujete manuál pro svůj EMOS E5018 Meteostanice? Níže si můžete zdarma prohlédnout a stáhnout PDF manuál v češtině. Tento produkt má aktuálně 5 často kladené otázky, 1 komentář a má 12 hlasů s průměrným hodnocením produktu 67/100. Pokud toto není manuál, který chcete, kontaktujte nás.

Je váš výrobek vadný a manuál nenabízí žádné řešení? Přejděte do Repair Café a získejte opravu zdarma.

Manuál

Loading…

2
AOK-5018B WIRELESS WEATHER STATION
The weather station displays the time along with 2 alarm clocks with snooze function, the weather forecast, interior and exterior temperatures, humidity,
the atmospheric pressure, lunar phase, the sunrise and sunset times, and also the moonrise and moonset times.
It has a memory for the minimum and maximum measured values.
Please read this product guide thoroughly before using the device.
GB
Specications:
Radio controlled clock
Accuracy: ±2 °C
Interior/exterior temperatures: 0 °C to +50 °C; -50 °C to +70 °C
Temperature resolution: 0.1 °C
Wireless sensor: broadcast frequency 433 MHz
Radio signal range: up to 30 m in free space
Number of sensors: 3
Relative humidity: 20 % – 95 %
Resolution: 1 %
Accuracy: ±5 %
Barometer pressure scale: 850 hPa to 1050 hPa
Power supply:
a) main station: 2× 1.5 V AA battery (not included)
b) sensor: 2× 1.5 V AAA battery (not included)
Size and weight:
a) main station: 189 × 139 × 30 mm; 306 g (without batteries)
b) sensor: 60 × 99 × 21 mm; 43 g (without batteries)
List of icons and buttons
Front display
A – interior temperature below
+4 °C
B – weather forecast icon
C – pressure trend
D – depleted battery icon
E – exterior sensor number
F – temperature trend
G – humidity trend
H – exterior temperature and
humidity
I – interior temperature and
humidity
J – physical comfort icon
K – date, day of the week, week
number
L – DCF77 radio signal reception
icon
M – alarm clock icons
N – current time
O – moonrise and moonset
P – country and city code
R – sunrise and sunset
S – lunar phase icon
T – pressure value and history
Rear side
Button push Button hold (3 seconds)
CHANNEL Sensor number Search for sensor No. 1,2 3
HISTORY
Pressure history over the
last 12 hours
Setting of altitude above sea
level, pressure units, weather
icon
-
1 step back
Display temperatures in
°C or °F units
Thermal limit setting
+
1 step forward
Display max/min tem
-
perature and humidity
values
MODE Alarm time No. 1, 2
Setting the alarm, time and
date
RESET Erase all values
Upper side
SNOOZE/LIGHT – Display light and snooze functions
Wireless sensor
Front side
- external temperature
- external humidity
CH1,2,3 – No. of channel reserved for communication of the sensor with
the weather station
Rear side
CH – switching for sensor channel
°C/°F – temperature units
Commissioning
1. First insert the battery into the weather station (2× AA), then to the
wireless sensor (2× AAA). When installing the batteries, ensure correct
polarity to avoid damaging the weather station or the sensor. Use alka
-
line batteries of the same type only; do not use rechargeable batteries.
2. Position both units next to each other. The weather station will nd
the signal from the sensor within three minutes. If the sensor signal
is not found, hold the CHANNEL button to repeat the search.
3. If the external temperature value vanishes from the display, push
theRESET button on the weather station. The weather station resets
all values to zero and nds the sensor signal again.
4. We recommend positioning the sensor on the northern side
of the house. In built-up areas, the sensor range may drop rapidly.
5. The sensor is resistant to splash and dripping water; do not subject
it to permanent contact with adverse weather and rain.
6. Do not put the sensor on metal surfaces; it might weaken the signal.
7. If the weak battery icon (D eld) appears, replace the batteries in the
sensor or the weather station.
Channel change and connecting more sensors
1. Use the CHANNEL button on the rear of the weather station to choose
the desired sensor channel - 1, 2 or 3. Then hold the CHANNEL button
until the icon starts blinking.
2. On the rear side of the sensor, remove the battery compartment cover
and insert the batteries (2× AAA).
3. Set the required number of the sensor channel - 1, 2, 3 using the CH
button – it will be shown on the front display. Within 3 minutes the
data from the sensor will be read.
4. If the sensor signal is not found, remove the battery and reinsert.
Radio controlled clock (DCF77)
After logging to the wireless sensor, the weather station starts to automa-
tically search for the DCF77 signal over 7 minutes, the L icon is blinking.
During the search no data on the display are updated and the buttons do
not function (except SNOOZE/LIGHT).
Signal found – the icon stops blinking and it shows the current time.
Signal not found – the icon disappears.
To start a new search for the DCF77 signal push the buttons + and – at
the same time.
To cancel the DCF77 signal search, push the buttons + and – at the same
time again.
The DCF77 signal will be synchronised daily between 2:00 and 3:00 a.m.
To ensure correct signal reception, do not place the sensor near electrical
appliances and mobile phones.
Manual setting of the time, date and location to
show the time of sunrise, sunset, moonrise and
moonset
1. Hold the MODE button
2. Use the buttons + and – to set the year – month - day – time shift – day
language - 12/24 time format – hour – minute – city (country) code.
Other cities and countries are listed on page 22 - 23.
3. The week number is set automatically according to the set date.
4. You can move from one value to another by pushing the MODE button.
5. After setting the city code, the weather station will set the time of
sunrise and sunset (R eld) and moonrise, moonset (O eld).
Interior and exterior temperatures, humidity,
temperature unit
The interior temperature and humidity is displayed in eld I.
Exterior temperature and humidity is displayed in eld H.
Button – choose the temperature unit °C/°F.
Temperature and humidity trend
The arrow shows the trend in the measured values of temperature (F icon)
and humidity (G icon) for the specic sensor or station.
Indicators on the
display
Temperature and humi-
dity trend
Rising Stable Falling
Stáhnout manuál v český (PDF, 1.02 MB)
(Zvažte dopad na životní prostředí a tento manuál si vytiskněte pouze v případě, že výtisk skutečně potřebujete)

Loading…

Hodnocení

Ohodnoťte EMOS E5018 Meteostanice a dejte nám vědět, co si o výrobku myslíte. Chcete se podělit o své zkušenosti s tímto výrobkem nebo se na něco zeptat? Nechte nám ve spodní části stránky komentář.
Jste spokojeni s EMOS E5018 Meteostanice?
Ano Ne
67%
33%
12 hlasy

Zapojte se do konverzace o tomto výrobku

Zde můžete sdílet, co si myslíte o EMOS E5018 Meteostanice. Máte-li dotaz, nejprve si pozorně přečtěte návod. Žádost o příručku lze provést pomocí našeho kontaktního formuláře.

Alexa 25-04-2021
Výrobek se mi moc líbí, ale v určitých intervalech pípá, což je v noci dost otravné...vím, že to něco naznačuje, ale moc přesně nevím, co a nikde nemůžu najít způsob, jak to pípání zastavit. necvrliká pořád, jen jeden, ale na to si bohužel taky nemůžu zvyknout. Díky za odpověď :)

odpověď | To bylo užitečné (0) (Přeloženo Googlem)

Více o tomto návodu

Chápeme, že je hezké mít k vašemu EMOS E5018 Meteostanice papírovou příručku. Manuál si můžete vždy stáhnout z našich webových stránek a vytisknout si jej sami. Pokud byste chtěli mít originální příručku, doporučujeme vám kontaktovat EMOS. Možná by byli schopni poskytnout originální návod. Hledáte příručku ke svému EMOS E5018 Meteostanice v jiném jazyce? Vyberte si preferovaný jazyk na naší domovské stránce a vyhledejte číslo modelu, abyste zjistili, zda jej máme k dispozici.

Specifikace

Značka EMOS
Modelka E5018
Kategorie Meteostanice
Typ souboru PDF
Velikost souboru 1.02 MB

Všechny návody pro EMOS Meteostanice
Další manuály Meteostanice

Často kladené otázky o EMOS E5018 Meteostanice

Náš tým podpory vyhledává užitečné produktové informace a odpovídá na často kladené otázky. Pokud v nich najdete nějakou nepřesnost, kontaktujte nás prostřednictvím našeho kontaktního formuláře.

Moje meteostanice předpovídala, že bude pršet, ale nepršelo.Jak to? Ověřeno

Předpověď meteostanice je založená na tlaku vzduchu.Nízký tlak obecně znamená špatné počasí a vysoký tlak dobré počasí.Počasí se může vyvinout jinak, než jak předpovídá tlak vzduchu.

To bylo užitečné (1404) Přečtěte si více

Jaké je nejlepší umístění meteorologické stanice a jejích senzorů? Ověřeno

Samotná meteorologická stanice je umístěna uvnitř a musí být chráněna před zdroji tepla, jako je kuchyň, okna nebo elektrické spotřebiče. Samostatný snímač venkovní teploty musí být umístěn ve stínu a nejméně 1,25 m nad zemí. Dešťový senzor musí být umístěn na otevřeném prostranství, kde může vždy shromažďovat déšť. Senzor větru musí být umístěn také na volném prostranství, kde na něj mohou působit jakékoli překážky.

To bylo užitečné (334) Přečtěte si více

Moje meteorologická stanice má srážkoměr, dokáže také měřit množství sněžení? Ověřeno

Některé srážkoměry jsou vybaveny topným tělesem, díky kterému se sníh roztaje a umožňuje jeho měření. Bez topného tělesa se srážkoměr ucpe a nelze provádět žádné měření.

To bylo užitečné (235) Přečtěte si více

Baterie v mém zařízení je oxidovaná, mohu ji přesto bezpečně používat? Ověřeno

Ja, zařízení lze stále bezpečně používat. Nejprve vyjměte oxidační baterii. Nikdy k tomu nepoužívejte holé ruce. Poté očistěte přihrádku na baterie vatovým tamponem namočeným v octě nebo citronové šťávě. Nechejte zaschnout a vložte nové baterie.

To bylo užitečné (234) Přečtěte si více

Mohu vyměnitelnou baterii v zařízení nechat dlouho? Ověřeno

Vyměnitelné baterie mohou zůstat v zařízení po dlouhou dobu, pokud se zařízení používá. Pokud je zařízení dlouhodobě skladováno, je doporučeno vyjmout baterie, aby nedošlo k oxidaci.

To bylo užitečné (234) Přečtěte si více
Manuál EMOS E5018 Meteostanice

Související produkty

Související kategorie