
10 GB/IE
Trampolines shall neither be installed over concrete, asphalt or any other
hard surface nor at proximity of other conflicting installations (e.g. pad-
dling pools, swings, slides, climbing frames);
Modification of trampoline is not allowed.
The self-locking nuts
24
are for one-time use only and new nuts must
be used each time the product is assembled.
Particular caution – Risk of injury for children
Keep the packaging materials away from children. There is a risk of suf-
focation!
Parents and other supervisors should be aware of their responsibility as
situations and conduct may arise for which the exercising equipment was
not designed due to the playfulness and experimentation that is natural
in children.
If you allow your children to use the product you should take their mental
and physical development into account and, most importantly, their tem-
perament. Supervise the children and always instruct them on how to use
the product correctly.
Store the product out of the reach of children when not in use.
Risks from wear
The product may only be used when in perfect condition. Examine the
product for damage and wear before each use. The safety of the product
can only be guaranteed if it is examined regularly for damage and wear.
Discontinue use if damage is found.
Avoiding damage to property
Avoid contact with sharp, hot, pointed, or hazardous objects. Please
ensure that your exercising area is free of pointed objects.
Prior to assembling
To assemble this product all you need is the wrench and special spring
loading tool provided with this product.
During periods of non-use the product can be easily disassembled and
stored.
Please read the assembly instructions before beginning to assemble the
product.
Please refer to page for part descriptions and numbers. The assembly steps
use these descriptions and numbers as reference for your convenience.
Make sure that you have all parts listed. If you are missing any parts,
please contact the producer.
To prevent any injuries to your hands from pinch points during assembly,
please use gloves to protect your hands.
Moving the trampoline
In order to move the trampoline you should have as many helpers as the
trampoline has feet. Prior to lifting, all used fasteners (pegs, etc.) should
be removed. Caution! Due to the spring tension there is a possible risk that
the frame can be twisted as a result of uneven lifting. You and your helpers
should therefore be respectively positioned between two feet of the trampoline
and you should then all lift the trampoline at the same time. Lift the trampoline
off the ground slightly and keep it horizontal with the floor. To move the
trampoline in a different way, disassemble it completely. To disassemble,
follow instructions for assembly backwards.
Assembly
Tools required:
1 x wrench
14
(included)
1 x screwdriver
21
(included)
1 x tool to tension the spring
28
(included)
Step 1 (Fig. A-G)
Please select all angled rods
4
, frame rods
5
, extension rods
8a
8b
and common sections
12a
12b
according to the products from the illustra-
tions. All parts with the sample part number are interchangeable, and to
connect the parts, simply slide section tubing that is smaller on one end
into adjacent section that has a larger opening.
Note: Frame rods`
5
punching holes upwards. While inserting the
extension rod
8a
into the common section
12a
, ensure the screw holes of
the both parts align.
The bottom screw hole of extension rod
8a
and screw hole of angled
rod
4
facing inward of the trampoline and then thread a self-tapping
screw
16
by screwdriver
21
.
The common section and extension rod are in alternately with hole
12a
8a
and without hole
12b
8b
on an angled rod
4
.
Step 2 (Fig. H-L)
When attaching springs
11
to the mat
1
, please invite another person
to help you with this portion of the assembly.
CAUTION! When attaching the springs
11
, the tube joints can become
pinch points since the product is tightening up.
Lay out the jump mat
1
with the printed side facing upwards in the product.
Position the circular hook of spring
11
on the eyelet of the jump mat
1
,
use the tool to tension the springs
28
to link up the round hook of spring
11
to the hole on the frame rods
5
.
Note: Refer to Fig. H for which hook of spring
11
to the mat
1
and
frame rod
5
.
Select an arbitrary point on the frame rods
5
(designate it as point ZERO).
Thereby, attach the first spring
11
.
Count 15 holes from point ZERO in one direction. Thereby attach the
second spring
11
. Attach two further springs
11
at the same interval, so
that now four springs
11
are respectively attached in quarter-circle intervals.
Securely attach a further spring
11
in the middle of each quarter. If you
notice that you have skipped a hole and an eyelet, recount and remove
or attach any springs
11
required to maintain the rest of springs.
Step 3 (Fig. M-N)
Place the frame protection
2
on the assembled frame, so that the springs
and the frame are covered.
Please ensure that the frame protection covers all metal parts.
Place the elastic drawstrings so that every other string led over a common
section.
Fasten the drawstrings at the back of the common section. Knot the two
ends together.
Step 4 (Fig. O-Q)
Connect the lower enclosure pole
6
and upper enclosure pole
7
.
Put the pole cap
15
on the upper enclosure pole
7
and secure with
screw
16
, as Fig. O.
Mount the enclosure poles support with poles onto the trampoline leg
using the spacer
23
, screws
13
, nut
24
, cap nut
25
and washer
26
. Firm
the nuts using provided wrench
14
. Repeat until all the poles are set up.
Note: Use nut
24
on the upper hole of trampoline leg (hole of common
section
12a
), and use cap nut
25
on the lower hole (hole of extension
pole
8a
).
Note: Nut
25
is one time use only. The nylon lock in the nut may dam-
age after use, and so it must be replaced for a re-assembly.
Step 5 (Fig. R-U)
Spread out Enclosure net
3
on the trampoline mat. Locate the panel
with the doorway and align the net as to where you would like to get in
and out of the product. Fasten the buckle of the enclosure net
3
on the
pole cap
15
.
Knot the rope
27
on an eyelet of the jump mat
1
. Then thread is as
shown alternately through the eyelet of the jump mat
1
and the enclo-
sure net
3
. Ensure the enclosure net
3
is completely well tired on all
eyelets of the jump met
1
.
IMPORTANT: All snap closures must be once again clamped securely
so that the enclosure net becomes taut. If the enclosure net is not taut, it
cannot complete this function as designed.


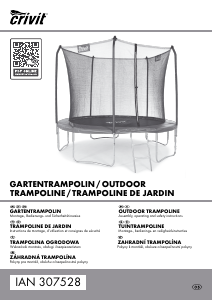



Zapojte se do konverzace o tomto výrobku
Zde můžete sdílet, co si myslíte o Crivit IAN 307528 Trampolína. Máte-li dotaz, nejprve si pozorně přečtěte návod. Žádost o příručku lze provést pomocí našeho kontaktního formuláře.
odpověď | To bylo užitečné (0) (Přeloženo Googlem)