Before you begin, please read the assembly intructions carefylly. Make sure that all
parts are included in the package. You should also read the Important instructions
section about driving performance etc.
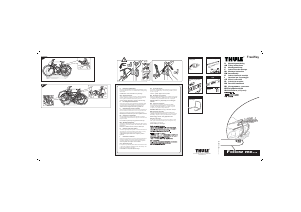
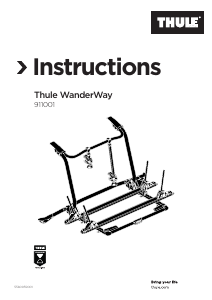
The bike carrier is attached using six tensioning straps. With all the straps fastened to
the bootlid and the bike carrier in place, it is still possible to open the boot on most
car models. Be careful when opening and shutting the boot. Check that the hooks are
not being squeezed or crushed. Bikes must be removed from the carrier before opening
the boot.
Clean the surface and edges of the tailgate before fitting the bike carrier.
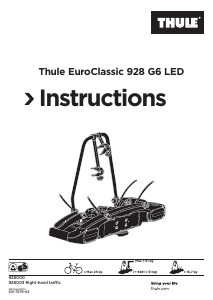
Fitting the bike carrier
1. Turn the upper arch so that it fits a good fit against the vehicle (see list of
recommendations). As a general rule, in the case of a saloon the forward part of
the upper arch should be pointing downwards, and in the case of an estate it should
be pointing upwards (see diagram). In the case of a hatchback the angle of the
tailgate will determine the position of the arch (shallow angle: downwards, steep
angle: upwards).
2. Fit the two arches together (see list of recommendations for correct hole combination
for the bolts). Pressing the plastic hubs onto the ends of the lower arch makes the
job easier.
3. Thread the fastening straps onto the bike carrier with the longer straps at the top.
Lift the carrier onto the vehicle and fasten the hooks.
If some of the hooks can be fastened in a glass or plastic edge only, thread the
strap through the metal buckle as shown in Fig 3A, and fasten it to the interior of
the vehicle, between vehicle and the tailgate. Check that the metal buckle does
not catch when the tailgate is closed.
Fasten the lower straps to the bottom edge of the tailgate. If the lower straps cannot
be fastened in this way, fasten them to the underside of the vehicle at some point
that will bear the strain. For example, loop the end so that it can be fastened round
a towing ring as shown in Fig B. Check that the straps do not rub against any sharp
edges or come too close to the exhaust pipe, and do not fasten it to a plastic
component.
Now tighten the straps up fully, making sure that they follow the shortest
route so that there is no risk of them being shaken free.
Loading the bikes
4. Fasten the strops in the rubber cradles from which the bikes are to be suspended.
5. Load the bike/bikes. Angle the rubber cradles correctly before loading ladies
bikes.
6. Secure the bike/bikes to the tubes of the carrier with the straps, if possible securing
the front wheels in the same way. Make sure that the pedals do not come in contact
with the vehicle.
Now tighten the straps up fully, and check that the carrier and bike/bikes are
secured firmly in position. Tie up any loose strap ends.
Important instructions
If the car is equipped with automatic boot/tailgate opening, this function must be
disabled and the luggage compartment opened manually when the bike carrier is
fitteda
Always clean the surface and edges of the tailgate before fitting the bike carrier.
Certain types of accessory, e.g. spoilers, wind deflectors etc may require modifications
in the way the bike carrier is fitted. In worst cases they may make it impossible
to fit the carrier at all. Ask your Thule dealer for advice.
Check that the straps are tight at regular intervals, and tighten them up as necessary.
Worn or damaged straps should be replaced immediately.
Never load bikes so that the wheels hang immediately behind the exhaust pipe.
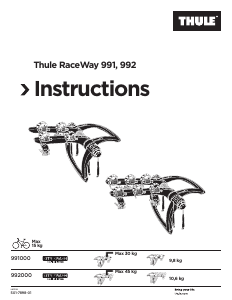
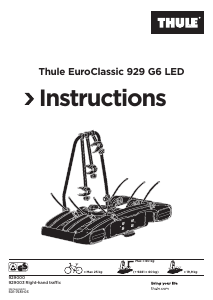
The bike carrier is designed for transportation of a maximum of three bikes.
The bike carrier is not designed for transportation of tandems.
Remove all loose items from bikes before transportation.
The length of the vehicle will be increased by approx. 600 mm when the bike
carrier is fitted. Loading bikes may increase the width of the vehicle.
The car's road behaviour may change with the bike carrier fitted and loaded,
particularly when taking curves and when braking. The applicable speed limits
and other traffic regulations shall always be followed. Your speed should always
be within an ample safety margin with regard to road and traffic conditions and
the load you are carrying, but never higher than 120 km/h under any circumstances.
Warning! Drive slowly over speed bumps, maximum speed 10 km/h.
As the bike carrier and any bikes loaded obscure the vehicles rear lights and
registration plate, a light bar should be fitted.
Remove the bike carrier when not in use.
Thule disclaims any liability in respect of personal injuries and/or damage to
property, or consequential losses arising therefrom, caused by the incorrect fitting
or use of any Thule product.
The rear window wíper should be disconnected or removed when using the Freeway,
and must unconditionally be disconnected on cars with automatic rear wiper
operation - ask your workshop.
GB Instructions for assembly and use
Fits all cars. See points 1
The FreeWay can be fitted to more cal models than those
indicated in the Recommendation List.
501-7265-02
318


Zapojte se do konverzace o tomto výrobku
Zde můžete sdílet, co si myslíte o Thule FreeWay 968 Nosič jízdních kol. Máte-li dotaz, nejprve si pozorně přečtěte návod. Žádost o příručku lze provést pomocí našeho kontaktního formuláře.