4
IMPORTANT: RETAIN FOR FUTURE REFERENCE. READ CAREFULLY.
EN
EASY WALL-MOUNTED CHANGING TABLE
SCHEMA 1 SCHEMA 2
SCHEMA 3 SCHEMA 4 SCHEMA 5 SCHEMA 6
90/95 cm
A B
DC
SCHEMA 1 SCHEMA 2
SCHEMA 3 SCHEMA 4 SCHEMA 5 SCHEMA 6
90/95 cm
A B
clic
DC
SCHEMA 1 SCHEMA 2
SCHEMA 3 SCHEMA 4 SCHEMA 5 SCHEMA 6
90/95 cm
A B
clic
DC
SCHEMA 1 SCHEMA 2
SCHEMA 3 SCHEMA 4 SCHEMA 5 SCHEMA 6
90/95 cm
A B
clic
DC
SCHEMA 1 SCHEMA 2
SCHEMA 3 SCHEMA 4 SCHEMA 5 SCHEMA 6
90/95 cm
A B
clic
DC
SCHEMA 1 SCHEMA 2
SCHEMA 3 SCHEMA 4 SCHEMA 5 SCHEMA 6
90/95 cm
A B
clic
DC
WARNING
• Never leave your child unattended.
• Be aware of the danger of placing the changing table near open
flames or other sources of extreme heat, such as electric or gas
heaters, etc.
• Do not use the changing table if any elements are broken,
damaged or missing, and use only manufacturer-approved
spare parts.
• All assembly elements must always be kept tight, checked
regularly and tightened if necessary.
• The weight of the child for whom the product is intended must
not exceed 11 kg (12 months)
• ATTENTION: Ensure the changing table is closed properly when
filling the storage containers.
LIST OF PARTS AND TOOLS NEEDED
1. Wall-mounted changing table
2. Handle
3. Changing pad
4. Two storage containers
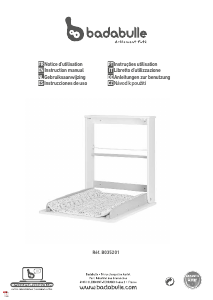
AFFIXING THE TABLE TO THE WALL
USING THE EASY CHANGING TABLE
Two people are required to affix the
changing table to the wall.
To ensure the product can be used safely,
use screws suited to the type of wall to affix
the changing table.
We cannot provide the exact type of screw
because there are many types of walls and
partitions. You must identify the type of wall
you will be affixing the table to in order to
ensure you purchase the correct type of
screws.
Affix the Easy changing table 90-95 cm
above the floor.
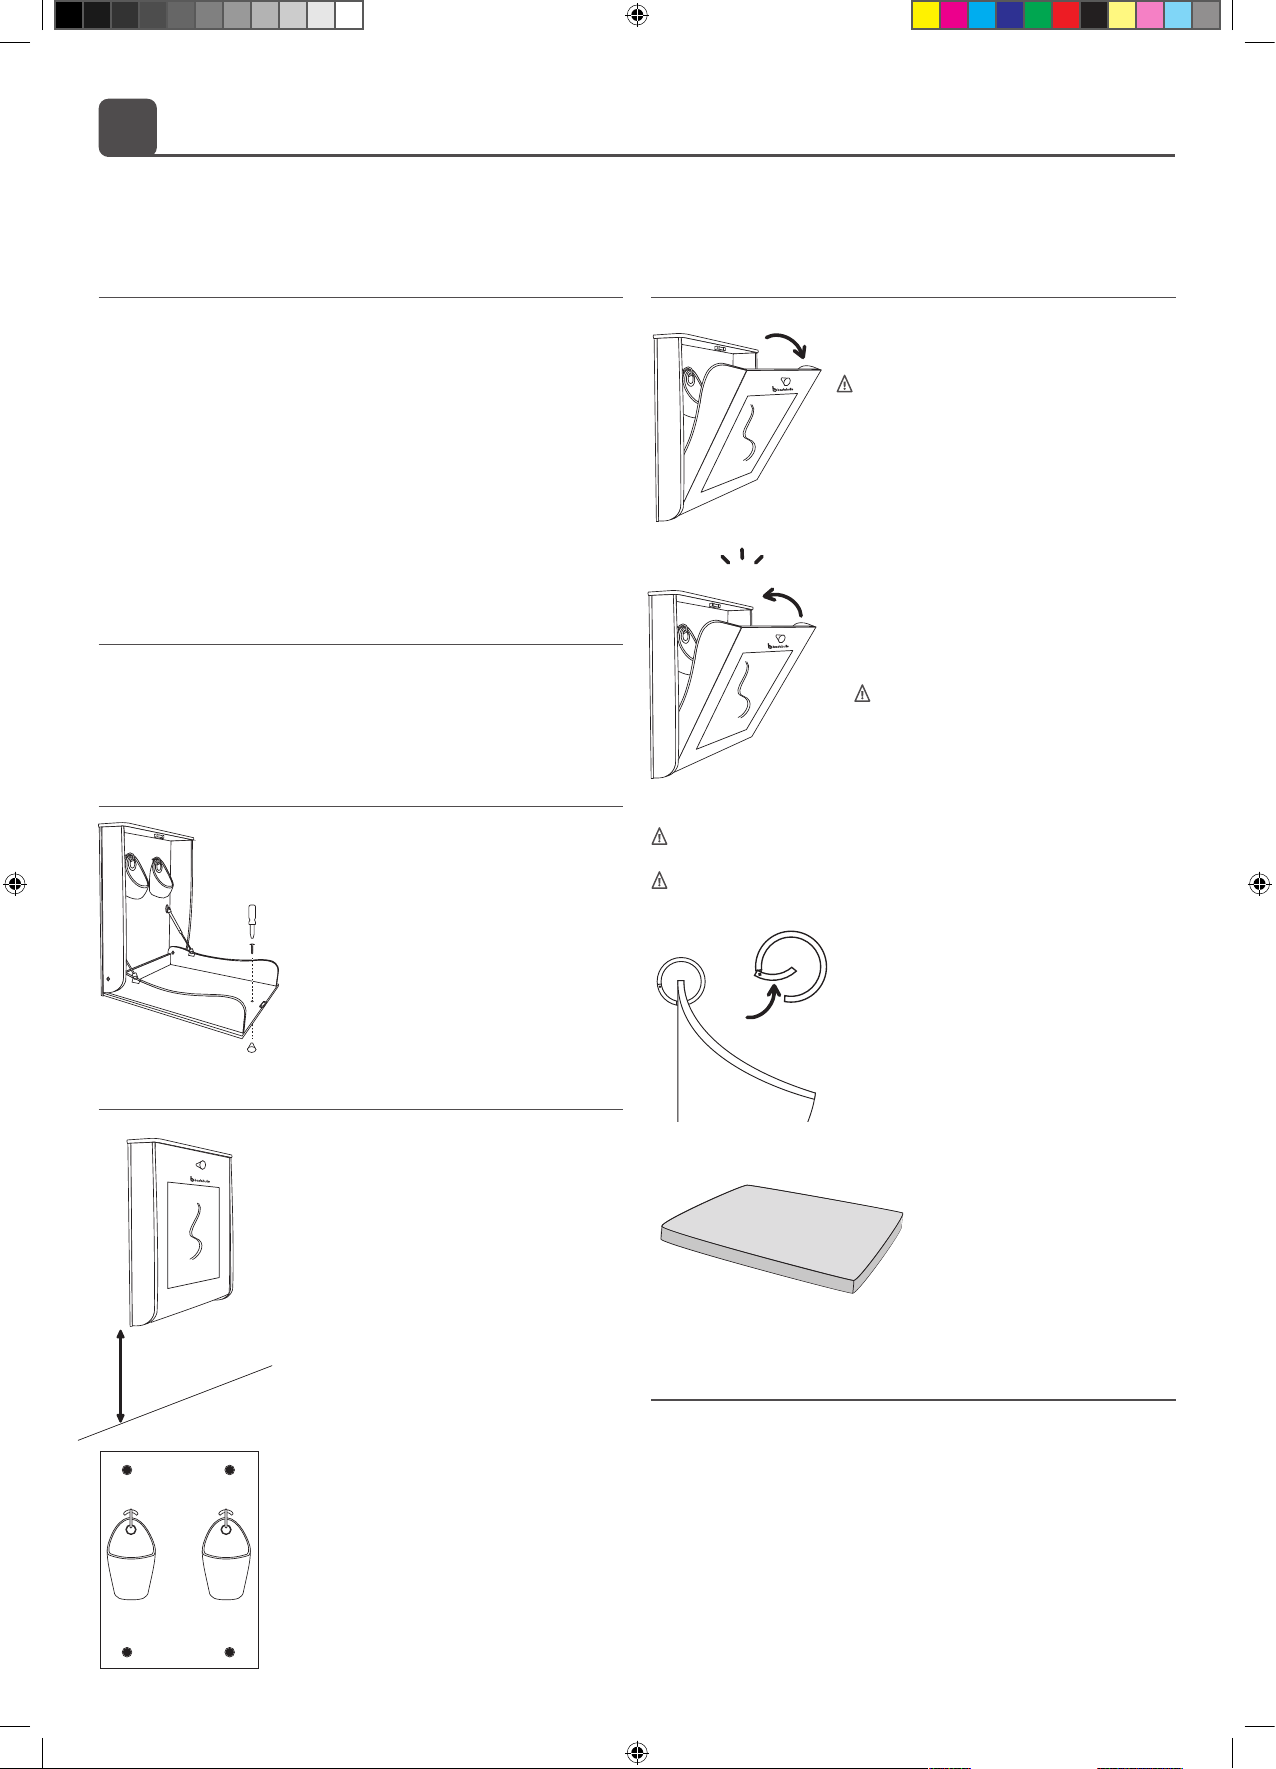
OPENING
Pull on the handle until the table is in a
horizontal position.
ATTENTION: Do not lean or sit on the
table when it is in the open position.
To help you fix your table, measure the gap
between the holes A, B, C, and D and then
transfer this measurement onto your wall.
Use holes A B C and D to affix the Easy
changing table using screws suited to your
type of wall.
CLOSING
1. Return the changing table to the vertical
position.
2. Ensure the locking system has snapped
closed.
3.
ATTENTION : 3. Ensure the storage
containers are not so full as to prevent
the changing table from locking
properly.
STORAGE CONTAINERS
The storage containers are removable.
They hook and unhook from the changing
table.
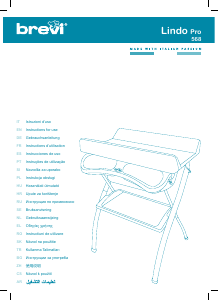
CHANGING PAD
The changing pad is removable. It
is attached to the changing table
with Velcro strips.
ATTENTION: YOU SHOULD NOT HAVE TO FORCE THE CHANGING
TABLE TO LOCK IT
ATTENTION: Always close the changing table after use
WASHING INSTRUCTIONS
The mattress and the storage baskets can be washed with a damp
sponge.
For the rest of the changing table, use only mild detergents or
cleaning products. Wipe the changing table with a damp cloth.
SCHEMA 1 SCHEMA 2
SCHEMA 3 SCHEMA 4 SCHEMA 5 SCHEMA 6
90/95 cm
A B
clic
DC
5. Two hooks
6. Customisable stickers
7. Screwdriver (not included)
SCHEMA 1 SCHEMA 2
SCHEMA 3 SCHEMA 4 SCHEMA 5 SCHEMA 6
90/95 cm
A B
clic
DC
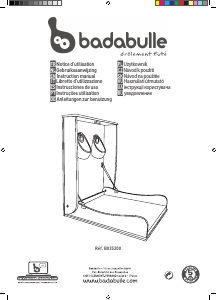
FIXING THE HANDLE
Open front panel and unscrew the
handle inside.
Now, with the screw provided, screw
the handle in the hole made for the
purpose in the front side of your
changing table.
SCHEMA 1 SCHEMA 2
SCHEMA 3 SCHEMA 4 SCHEMA 5 SCHEMA 6
90/95 cm
A B
clic
DC


Zapojte se do konverzace o tomto výrobku
Zde můžete sdílet, co si myslíte o Badabulle B035200 Prádelník. Máte-li dotaz, nejprve si pozorně přečtěte návod. Žádost o příručku lze provést pomocí našeho kontaktního formuláře.