Manuál Adler AD 7919 Větrák

Potřebujete manuál pro svůj Adler AD 7919 Větrák? Níže si můžete zdarma prohlédnout a stáhnout PDF manuál v češtině. Tento produkt má aktuálně 2 často kladené otázky, 2 komentářů a má 0 hlasů. Pokud toto není manuál, který chcete, kontaktujte nás.

Je váš výrobek vadný a manuál nenabízí žádné řešení? Přejděte do Repair Café a získejte opravu zdarma.

Manuál

Loading…

4
20. Do not touch power cord with wet hands.
21. Unplug the unit when cleaning, removing / replacing filter, or moving the device.
22. for best results, place the unit on a higher surface like a table or countertop.
23. Do not place the device in passageways or high traffic areas where there is a
possibility of tripping or knocking it over.
24. Do not allow any foreign objects inside the device.
25. Do not place items on the top of device.
26. Do not block the front and back grills of the device.
27. Do not turn the device upside down.
28. Do not submerge the device under water or other liquids.
PRODUCT DESCIRPTION Air Cooler AD7919 (Figure I.)
1. Water tank 2. Water tank lid 3. USB cord
4. Lifting handle 5. Adjustable air outlet 6. Water level gauge
7. Power switch 8. Fan air speed button 9. Timer button
10. USB port 11. Drain plug 12. Batteries chamber cover
13. LCD display
BEFORE FIRST USE
1. Place the device on a raised surface as table, desk or counter top. This is the best way to cool your personal area faster.
2. Let filter absorb water for at least 3 minutes after filling the tank and before use. Doing so will get you coolest air quicker.
3. Try to stay within 1-2m of the device.
4. The device will run up to approximately 8-10 hours on low fan speed after filling up the water tank by 500ml of clean water.
5. Even if water tank is empty, filter is still damp and the device is still cooling.
During using a device powered by USB 5V, there is no need to remove the battery. When connecting the device to the USB 5V power
port, the battery power is automatically disconnected. During supplying the device with AA batteries, it is not possible to charge AA
batteries. It is recommended to remove the battery from the device if the battery is not used for a longer period (one month).
USING OF DEVICE
1. Place the device on flat surface.
2. Open the water tank lid and fill with water, we suggest use the jug (Figure II). Do not exceed maximum level at water gauge.
3. To supply the device you can chose one of below method:
- USB supply: Insert larger USB end of cable (3a) into your computer's USB port and the smaller end (3b) into the USB port (10) on the
back of the device.
- Batteries supply: Open the batteries chamber cover (12) by pressing both latches down and toward you to put 4 pieces of AA batteries
(1,5V) – not included with device. Batteries should be paced in correct position to match plus and minus indication shown inside
batteries chamber with actual position of battery. In order to disasemble battery act in oppositive way.
4. Press button ON/OFF (7) to power on the device.
5. Press button SPEED (8) to set the fan speed. Actual setting you will see on LCD display (13), by again pressing you can choose
from:
LL – low fan speed
HH – high / fast fan speed
6. Press button TIMER (9) to set up operation time. Range of period is from 1 to 12 hours an hour interval. The device stops operation
automatically after set up time passed.
7. Press button ON/OFF (7) again to turn off the device.
REMARK: We recommend running the device on fast fan speed for at least 5 minutes before turning off to allow drying it.
CLEANING AND MAINTENANCE
CAUTION: Do not allow the device's buttons to get wet.
1.Before cleaning the device remove the USB cable and batteries.
2.The housing should be cleaned using a damp cloth with a small amount of detergent.
3.To remove dust from grills may occasionally be wiped with a brush.
4. Before seasonal storage, empty water from water tank by unscrewing the drain plug (11). Next, we recommend running the device on
fast fan speed for 15 minutes before turning off to allow drying it.
5. Store the fan in a dry place.
TECHNICAL DATA
Power supply: USB 5V 0,5A or 4 pieces of AA 1,5V batteries
Power: 5W
Maximum power 50W
1,2m USB cord
Water tank capacity: 500ml
Water consumption: 50ml / hour
Noise level: < 50dB
Stáhnout manuál v český (PDF, 4.45 MB)
(Zvažte dopad na životní prostředí a tento manuál si vytiskněte pouze v případě, že výtisk skutečně potřebujete)

Loading…

Hodnocení

Ohodnoťte Adler AD 7919 Větrák a dejte nám vědět, co si o výrobku myslíte. Chcete se podělit o své zkušenosti s tímto výrobkem nebo se na něco zeptat? Nechte nám ve spodní části stránky komentář.
Jste spokojeni s Adler AD 7919 Větrák?
Ano Ne
Ohodnoťte tento výrobek jako první
0 hlasy

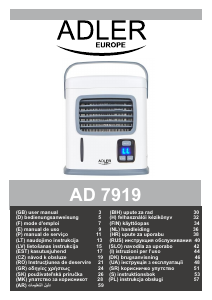
Zapojte se do konverzace o tomto výrobku

Zde můžete sdílet, co si myslíte o Adler AD 7919 Větrák. Máte-li dotaz, nejprve si pozorně přečtěte návod. Žádost o příručku lze provést pomocí našeho kontaktního formuláře.

Luisa Pozzi 24-06-2022
spotřebič se zapne, ale nefunguje

odpověď | To bylo užitečné (0) (Přeloženo Googlem)
Luisa Pozzi 24-06-2022
aplikace <recchio je nová zapne, ale nefunguje

odpověď | To bylo užitečné (0) (Přeloženo Googlem)

Více o tomto návodu

Chápeme, že je hezké mít k vašemu Adler AD 7919 Větrák papírovou příručku. Manuál si můžete vždy stáhnout z našich webových stránek a vytisknout si jej sami. Pokud byste chtěli mít originální příručku, doporučujeme vám kontaktovat Adler. Možná by byli schopni poskytnout originální návod. Hledáte příručku ke svému Adler AD 7919 Větrák v jiném jazyce? Vyberte si preferovaný jazyk na naší domovské stránce a vyhledejte číslo modelu, abyste zjistili, zda jej máme k dispozici.

Specifikace

Značka Adler
Modelka AD 7919
Kategorie Větráky
Typ souboru PDF
Velikost souboru 4.45 MB

Všechny návody pro Adler Větráky
Další manuály Větráky

Často kladené otázky o Adler AD 7919 Větrák

Náš tým podpory vyhledává užitečné produktové informace a odpovídá na často kladené otázky. Pokud v nich najdete nějakou nepřesnost, kontaktujte nás prostřednictvím našeho kontaktního formuláře.

Ovlivňuje ventilátor teplotu místnosti? Ověřeno

Ne, ventilátor pohybuje pouze vzduchem a poskytuje pokožce chladicí účinek.

To bylo užitečné (149) Přečtěte si více

Jaké je nejlepší místo pro fanouška? Ověřeno

Pokud existuje zdroj studeného vzduchu, například klimatizace, lze jej použít k lepší a další distribuci studeného vzduchu pomocí ventilátoru. Pokud se používá pouze ventilátor, je nejlepší umístit jej do výšky. Hlava je jednou z částí těla, která nejvíce proniká a pohybující se vzduch pomáhá odvádět teplo. To poskytuje maximální chladicí účinek.

To bylo užitečné (119) Přečtěte si více
Manuál Adler AD 7919 Větrák

Související produkty

Související kategorie